Total Pageviews

Thursday, December 26, 2013

BUILD IT YOURSELF - HOW TO BUILD A STORE BOUGHT SWIVEL BARSTOOL

I love store bought furniture, they are convenient and mostly always almost easy to assemble with no knowledge whatsoever on furniture construction.  I built a barstool to accompany another existing lonely barstool. All you need is a toolbox, in some cases the furniture comes with an Allen wrench that you can use to tighten the screws and bolts. I got the stool from Bed Bath and Beyond This took 15 minutes to do, it was very easy. PS: I once worked at Bed Bath and Beyond for maybe 6 months it is my 5th most favorite store(with coupons) after IKEA, Homegoods, Crate and Barrel and Loft. Here's how my building went...


My toolbox, I did not need it for this project. The Allen wrench worked fine.


The swivel came in a separate package,


Took out all parts from box,


Go over the instructions to see what bolts go where,


 Step one, assemble the legs.


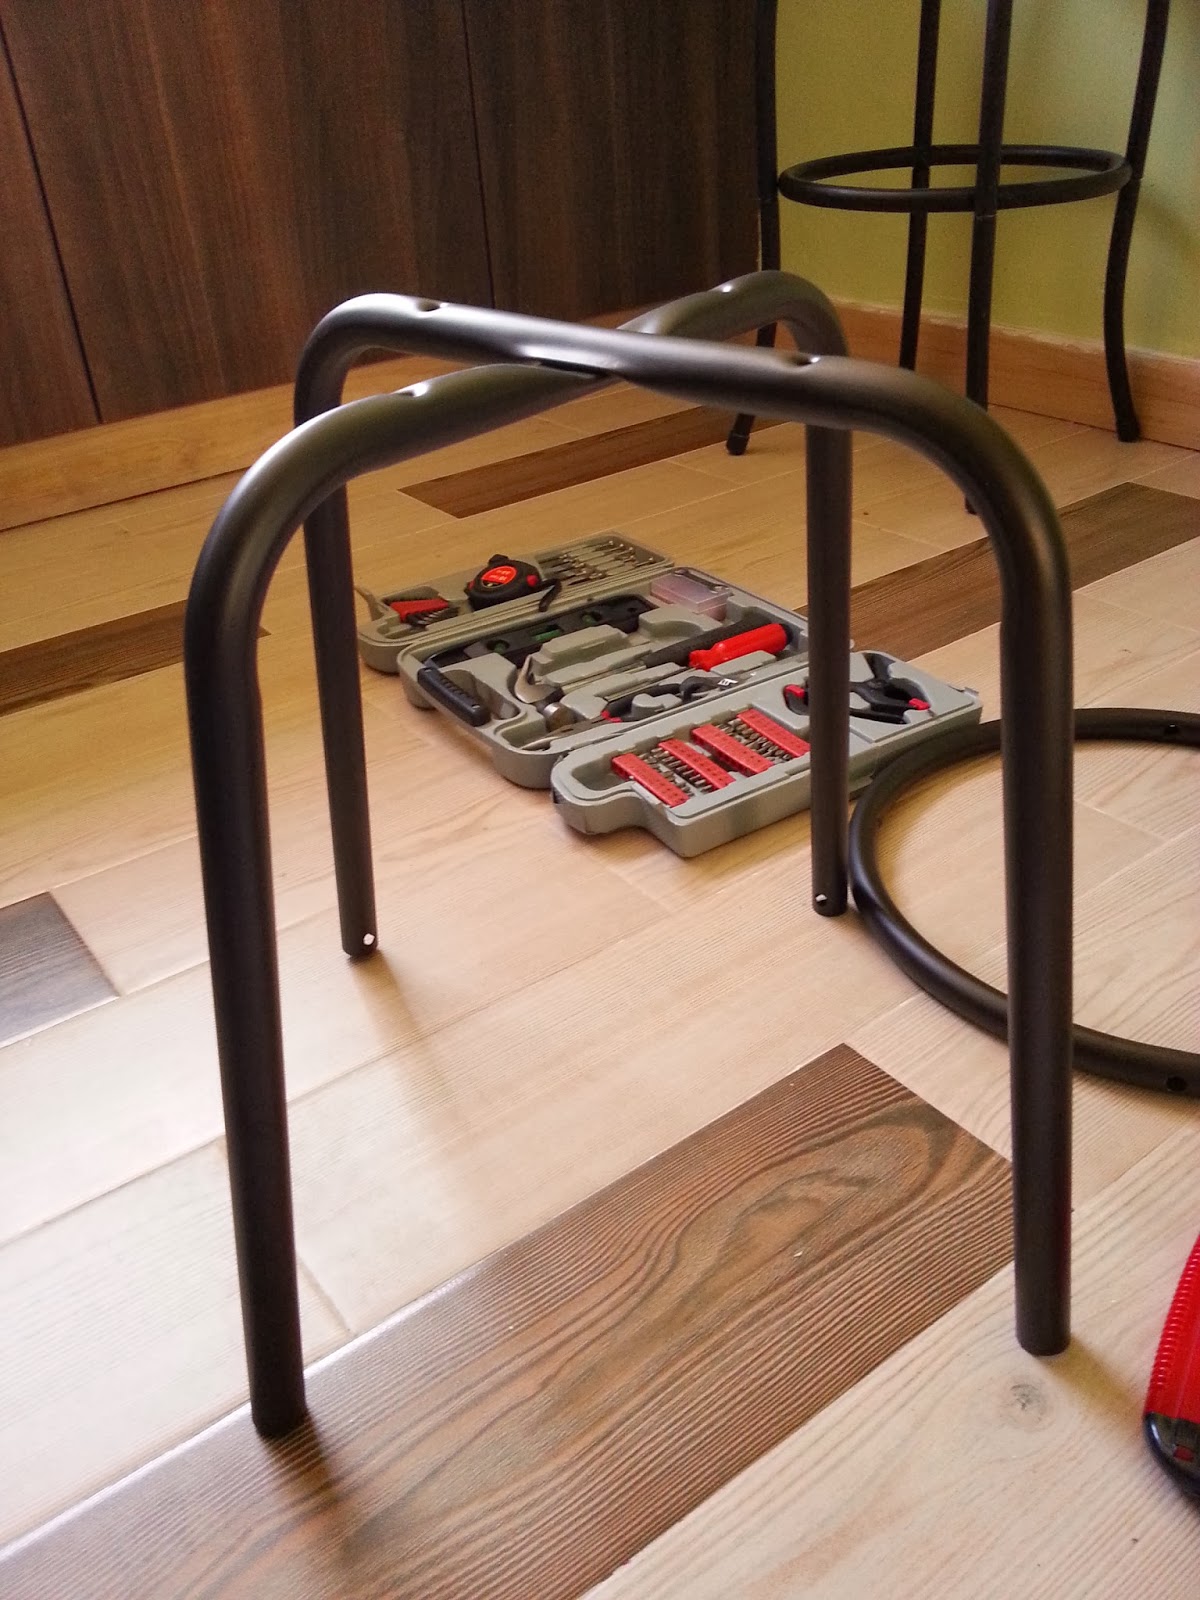
Screw in the bolts and washers.


Attach the swivel mechanism,


Attach the bottom legs,


Attach the seat,


Finally attach the backrest and you are good to go, happy seating!


Thanks for stopping by,


Dassa by Design.

Saturday, December 14, 2013

KITCHEN COLLECTIBLES

I think this post is coming from a confused-I-don't-know-what-is going-on-anymore place. The tomboy in me is finally getting a rare fascination with kitchen stuff, the thing is I only "feel" like cooking a few times a year, the rest of the times I fake fatigue or illness so I can get out of it. I love collecting cute stuff nevertheless, so here goes.

I got this chop and lift knife thing 1.5 years ago, I just opened it yesterday, yay! It might take another year or 2 before I use it but I will use it someday, right after I google what it actually does.


Next are these two engraved Wolfgang Puck huge spoons, if you are into "high-cuisine" you have probably heard of Wolfgang Puck. ( I bet if there's high-fashion there could be high-cuisine.no?). They are never polished but I still love them. I wouldn't have bought them if they were not engraved, they were an impulse I-gotta-have-this buy.


This set of knives was a gift, only used 2 so far.


I have no idea what this is, got it in a set of 3. It looks like a huge coaster, am guessing for a hot pot or a hot pan. Also got it 2 years ago, never used but will be used soon.


This peeler from IKEA, I love IKEA stuff, yet to be used.


This cutlery holder also from IKEA, I love stainless steel I will buy anything made from stainless steel.


These I bought because they were too cute, my spices will go there.


My set of "anything jars".... I only bought them only because they said "set of anything".


These cups, I got them from Tuskys, I picked one of every print to have them all mixed up instead of the usual way.


And lastly, IKEA fishies ice cube tray...fish cubes anyone?


That's it from my stash of cute collectibles...other people may call me a hoarder but it is what it is, if it's cute I have got to have it!

Have a lovely weekend,

Till next post,
Dassa by Design.

Wednesday, November 6, 2013

MINI FACELIFT FOR A GUEST BEDROOM


Guest room clean out and mini face lift! This room was neglected. It needed a little TLC.


I took pics in bits since I wasn't able to capture the whole room with all the light from the window.

Create an interesting focal point on one side since the bed rests on one wall as in this case. Also the room is small so a nightstand on either side of the bed was not going to happen.


Monochrome color pallet of beiges, olives, tans with hints of wine red were used.


I bought this oil painting for the wall but floor worked just fine.


The vintage pebble mini stool is a collectible more for outdoor than indoor.


An up close of the lamp, don't you just love the base? The light from the window is a bummer though. A book on the nightstand is also a great idea if the guests are readers.


The bed all made up.


End of post, your guests will sure enjoy their stay.


Thanks for stopping by,

Dassa by Design.

Wednesday, October 16, 2013

DIY: HOW TO GIVE LIGHT & LIFE TO A LAMPSHADE

Designing a room doesn't have to cost you $$$. You can actually design on a dime. Today I did a lampshade that had a nice base but the shade itself was errr....getting boring. This small change can give your room a little more zing.


Here's what you need

Scissors
Lampshade
Fabric
Tape
Pintucks


1. Cut fabric that can go around the lamp.


2. Fit the fabric around the lamp, apply tape to the top on the inside and use pins to tuck the bottom secure.
I used IKEA Fabric for this. Any fabric in a color that fits your theme is ok.


3.Enjoy your new lamp. Easy.


Thanks for stopping by.

Till next post,

Dassa by Design.


Friday, October 11, 2013

MASTER BEDROOM DO OVER TAKE 1

Here's to peaceful sleep areas. Time to add some chill to your chill-zone. Bedrooms should be peaceful areas. This is one ginormous bedroom. Now that am soon vacating the premise I finally get 1 million ideas what I would have done with it.....more pictures less words.

Before,

I picked this bed ages ago, loved it then not feeling this style now.


Whoever invented the bed-in-a-bag was a genious even though I find the duvet color too bland, it works.


Fitted sheet went on.


Added an old nightstand in the mix, some of the hardware  might have fallen off over the year, so I decided to fix them.


Bedspread done.


Hardware about to be re-fixed,


Added a lamp, I keep moving this lamp and any other furniture from room to room. And the nightstand now looks like it's sister or brother. I lately am not feeling the lamp on both nightstands look so I do one lamp and other items on the opposite side.


I like how clean and simple this looks even with no art on top of the headboard.


On the other nightstand I did 3 items; a ceramic bowl that I use to keep coins, my new latest collectible - an hourglass, and a vase with faux plants that also moves from room to room.


Other view with the dresser that was also missing knobs.


I have no idea why these pictures look so blurred, I think I need to take 1 or 2 photography classes. Here's an up close of the nightstand.


There goes the wasted space....now I would probably put a loveseat, a table, some cute curtains and hang art on the wall opposite the window on the right.

The other lamp I used on the dresser,


Selfie mode.


All cleared up.


Selfie, thanks for reading.


Thanks for stopping by,

Till next post.

Dassa by Design.